Cinematic Night Photography Guide: Photographing & Editing
Want your night photos to look like stills from a movie? The secret to cinematic, moody night photography isn’t in the gear—it’s in how you shoot.
In this guide, we’ll cover essential camera settings and field techniques to help you capture cinematic images straight out of camera.
Please keep in mind, this is not a complete beginner level guide to photography. Some basic knowledge of terms like aperture, shutter speed, ISO, and white balance, as well as basic editing tools like highlights, shadows, curves and HSL is required.
With that said, I will explain and break things down as simply as possible.

Ditch Auto White Balance
Step one: ditch auto white balance. It’s convenient, but for a cinematic look, you need control. Auto white balance tries to be “correct,” but cinematic style comes from the intentional use of colour for mood.
Colours have different emotions and feelings associated with them. When you’re trying to shoot in a cinematic way, you’re building a world, an atmosphere. So we use colour as a way to create that atmosphere. White doesn’t have to be white—in fact, it’s often more interesting when it’s not.
Take a look at the following images: the left uses auto white balance, the right uses manual. Notice the shift in emotion between them. With auto white balance, the camera neutralizes the man’s white shirt, draining warmth from the image. With manual white balance, we keep that warmth and create a nostalgic, moody atmosphere.
Auto White Balance

Manual White Balance
For a warm look, set your camera to the daylight (5000K) or cloudy (6000K) presets. You can fine-tune this in post—sometimes I slightly desaturate yellows and oranges if they’re too strong.


For a cool, cyberpunk palette, try White Fluorescent (3500k) or Tungsten (3000k). White Fluorescent leans blue/pink, tungsten skews blue/green. Both provide strong stylistic bases.
Yes, white balance can be adjusted in post—but choosing it in-camera helps you commit to a style. When I decide ahead of time—warm and dramatic, or cool and surreal—I see differently. It gives me direction, which leads to stronger compositions, more thoughtful storytelling and more cohesive image sets.

Expose For The Highlights
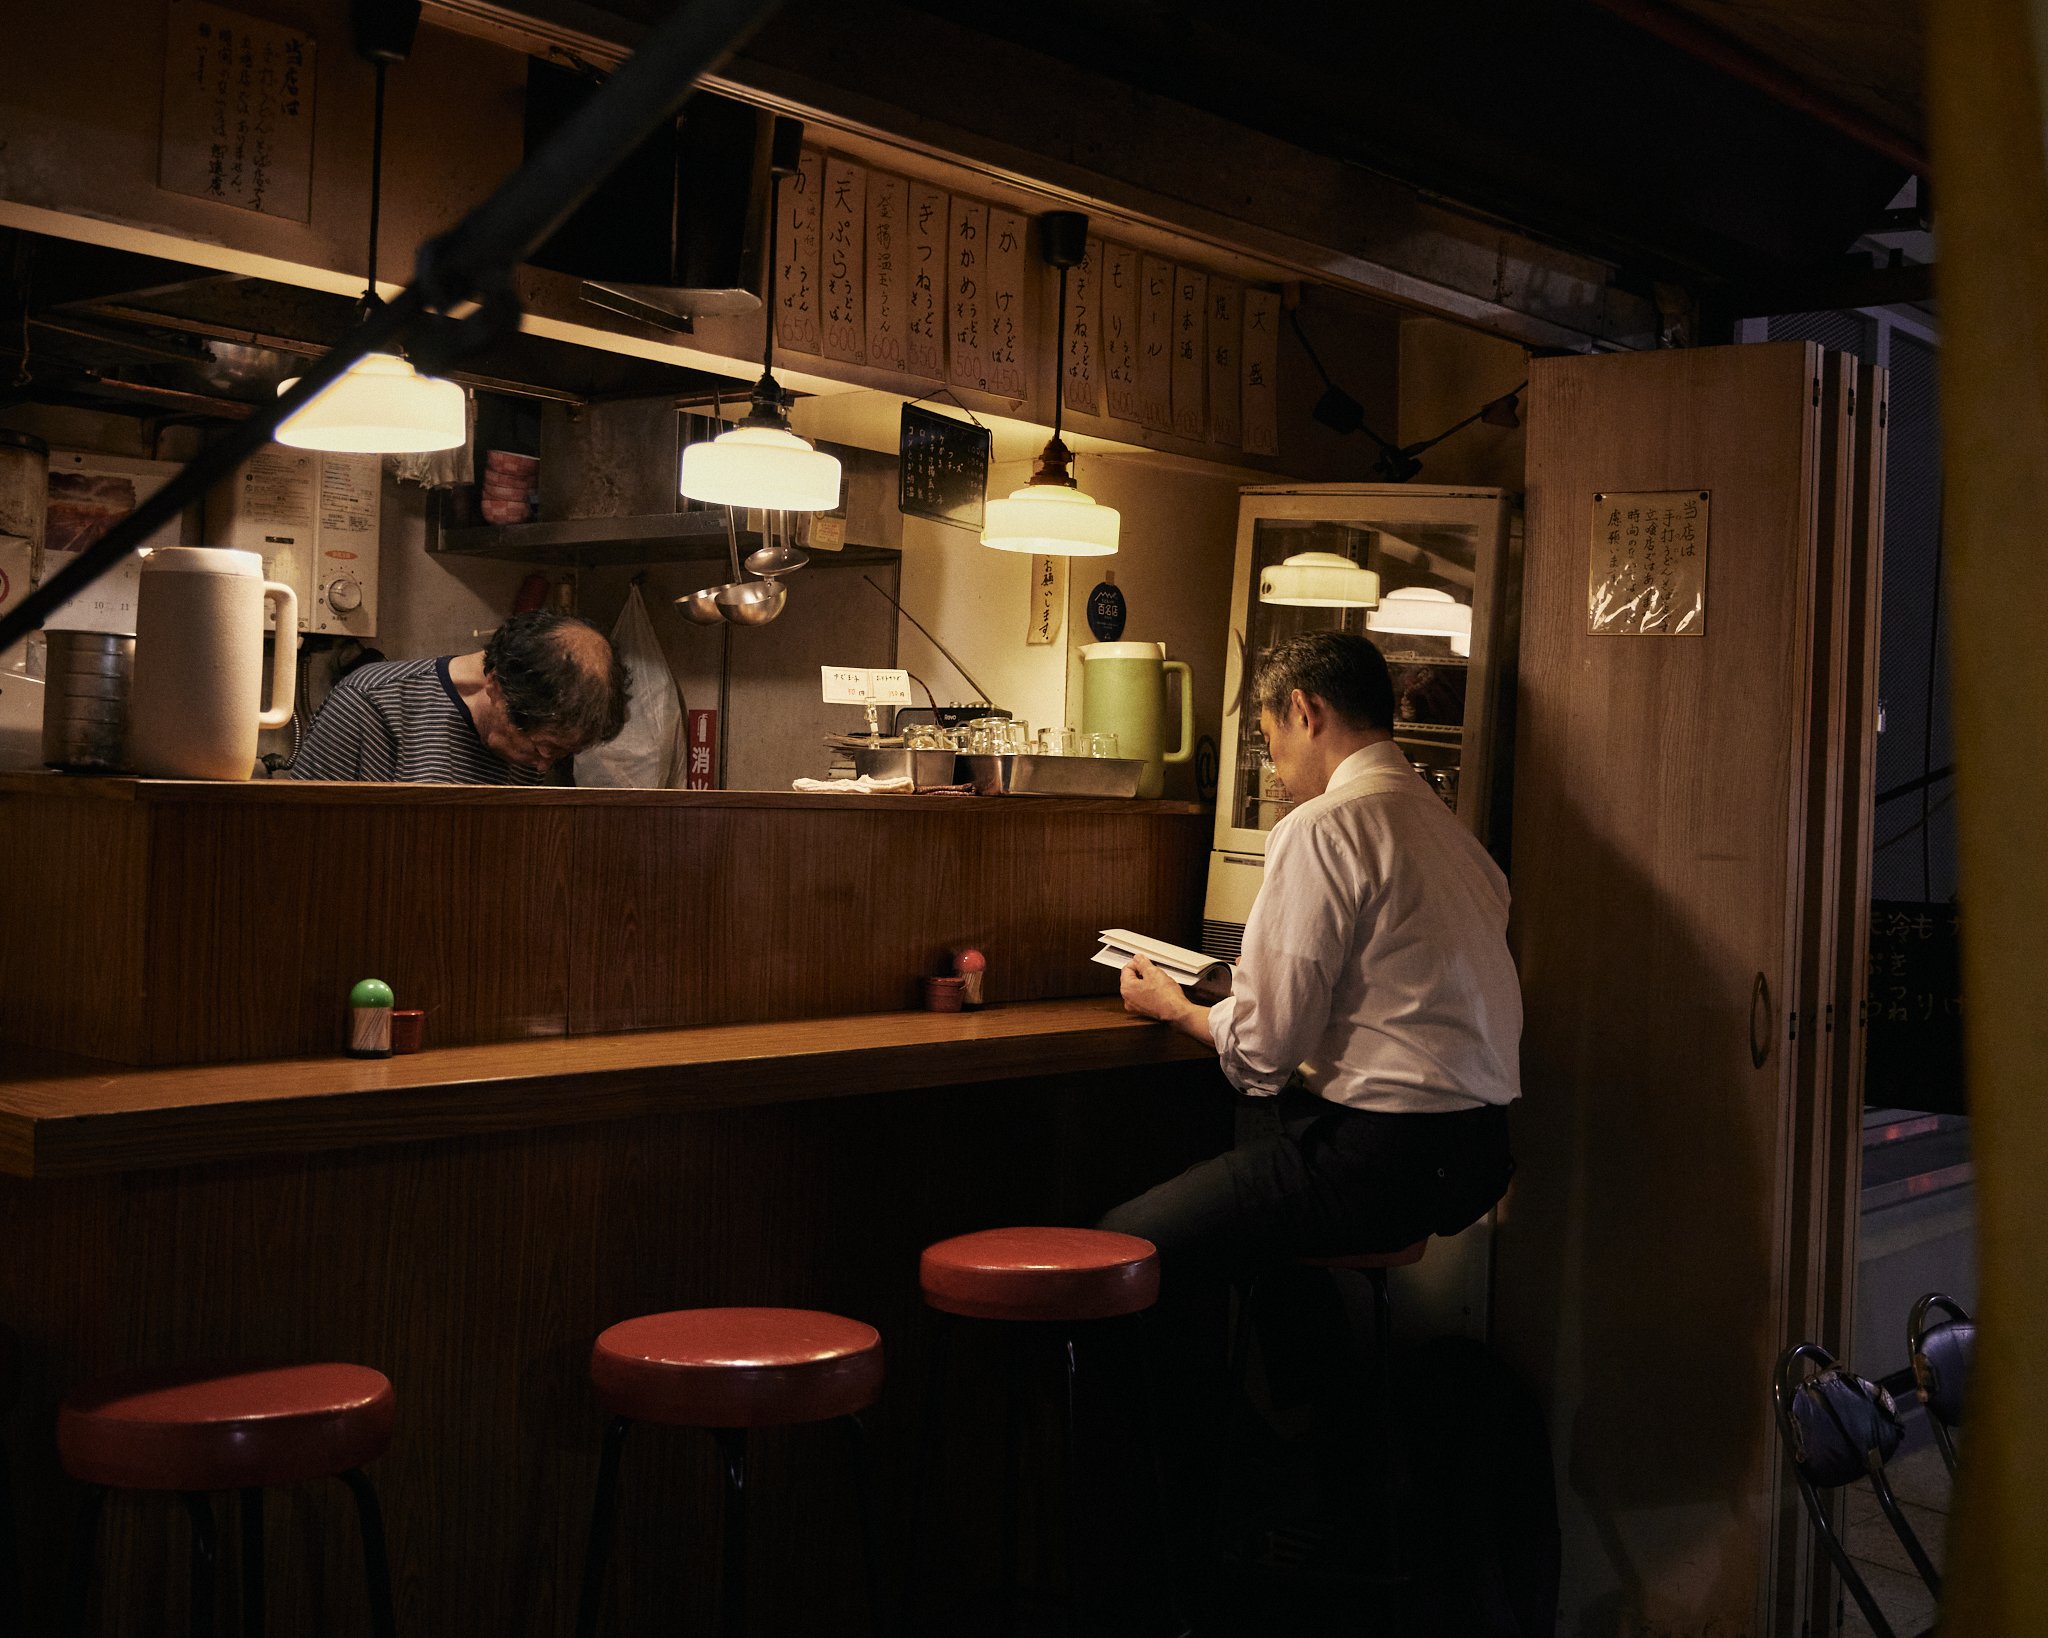
Expose for the highlights. It’s the most important setting in night photography. This approach preserves detail and makes your images feel closer to how we see in real life.
Check out the raw file in the next example—it’s dark, and that’s okay. There’s a huge contrast between artificial light and surrounding shadows, but if the highlights are intact, there’s room to work in editing. Digital sensors recover shadows better than blown highlights. Once something’s pure white, it’s lost—but shadows are flexible, and denoise tools keep improving.

ISO 1000 1/50 s f/5 50mm RAW File

Final Edited Image
The best way to judge whether your highlights are in tact is with the histogram. The graph is a visual representation of the brightness levels in your image. Your black point on the far left, and your white point on the far right. If the graph is pushed up against the right side, that highlight information is lost.

Editing starts with basic adjustments. Add some warmth to the white balance, bring down highlights and lift shadows to boost dynamic range. From here, I’ll use masking to shape the light and make my subject pop. Let’s walk through the process:

Basic adjustments for dynamic range

Flatten the top of the curve to bring down whites
My first mask selects the subject. I’ll brighten him just to the point of it looking fake, then dial it back a bit.

Mask the subject

+0.5 Exposure - It’s okay that he’s faded because it’s a hazy environment.
Then I mask the background using a large radial mask, subtracting the subject with AI or brush selection. I don’t want to brighten the subject anymore than I already did.
Brightening the background behind a dark subject creates a strong contrast which makes them pop. This will be common in night photography because of bright artificial lighting.

Mask the area behind the subject

+0.7 Exposure - Notice how the subject pops now compared to the previous image.
Finally, I create another radial mask to darken the edges again. When I raised shadows earlier, the whole image got brighter, so I bring those edges back down.
There’s an element of mystery to night time. And I can bring that feeling out by keeping shadows dark. Keeping some information hidden from the viewer. If everything is left bright and visible it can take away from that mysterious atmosphere.

Inverted radial mask around edges of frame

-1.3 Exposure - We draw the eye back into the subject.
Now we have a moody, cinematic exposure. You could stop here. Or tweak curves, highlights, and shadows further—or jump into the color grading tab for style.
For warm images, I grade with warm highlights and cool shadows. In the example image, I added green to the shadows to balance out reds.

RAW File

Basic Adjustments / Curves / Masking / Crop
Keep It Simple
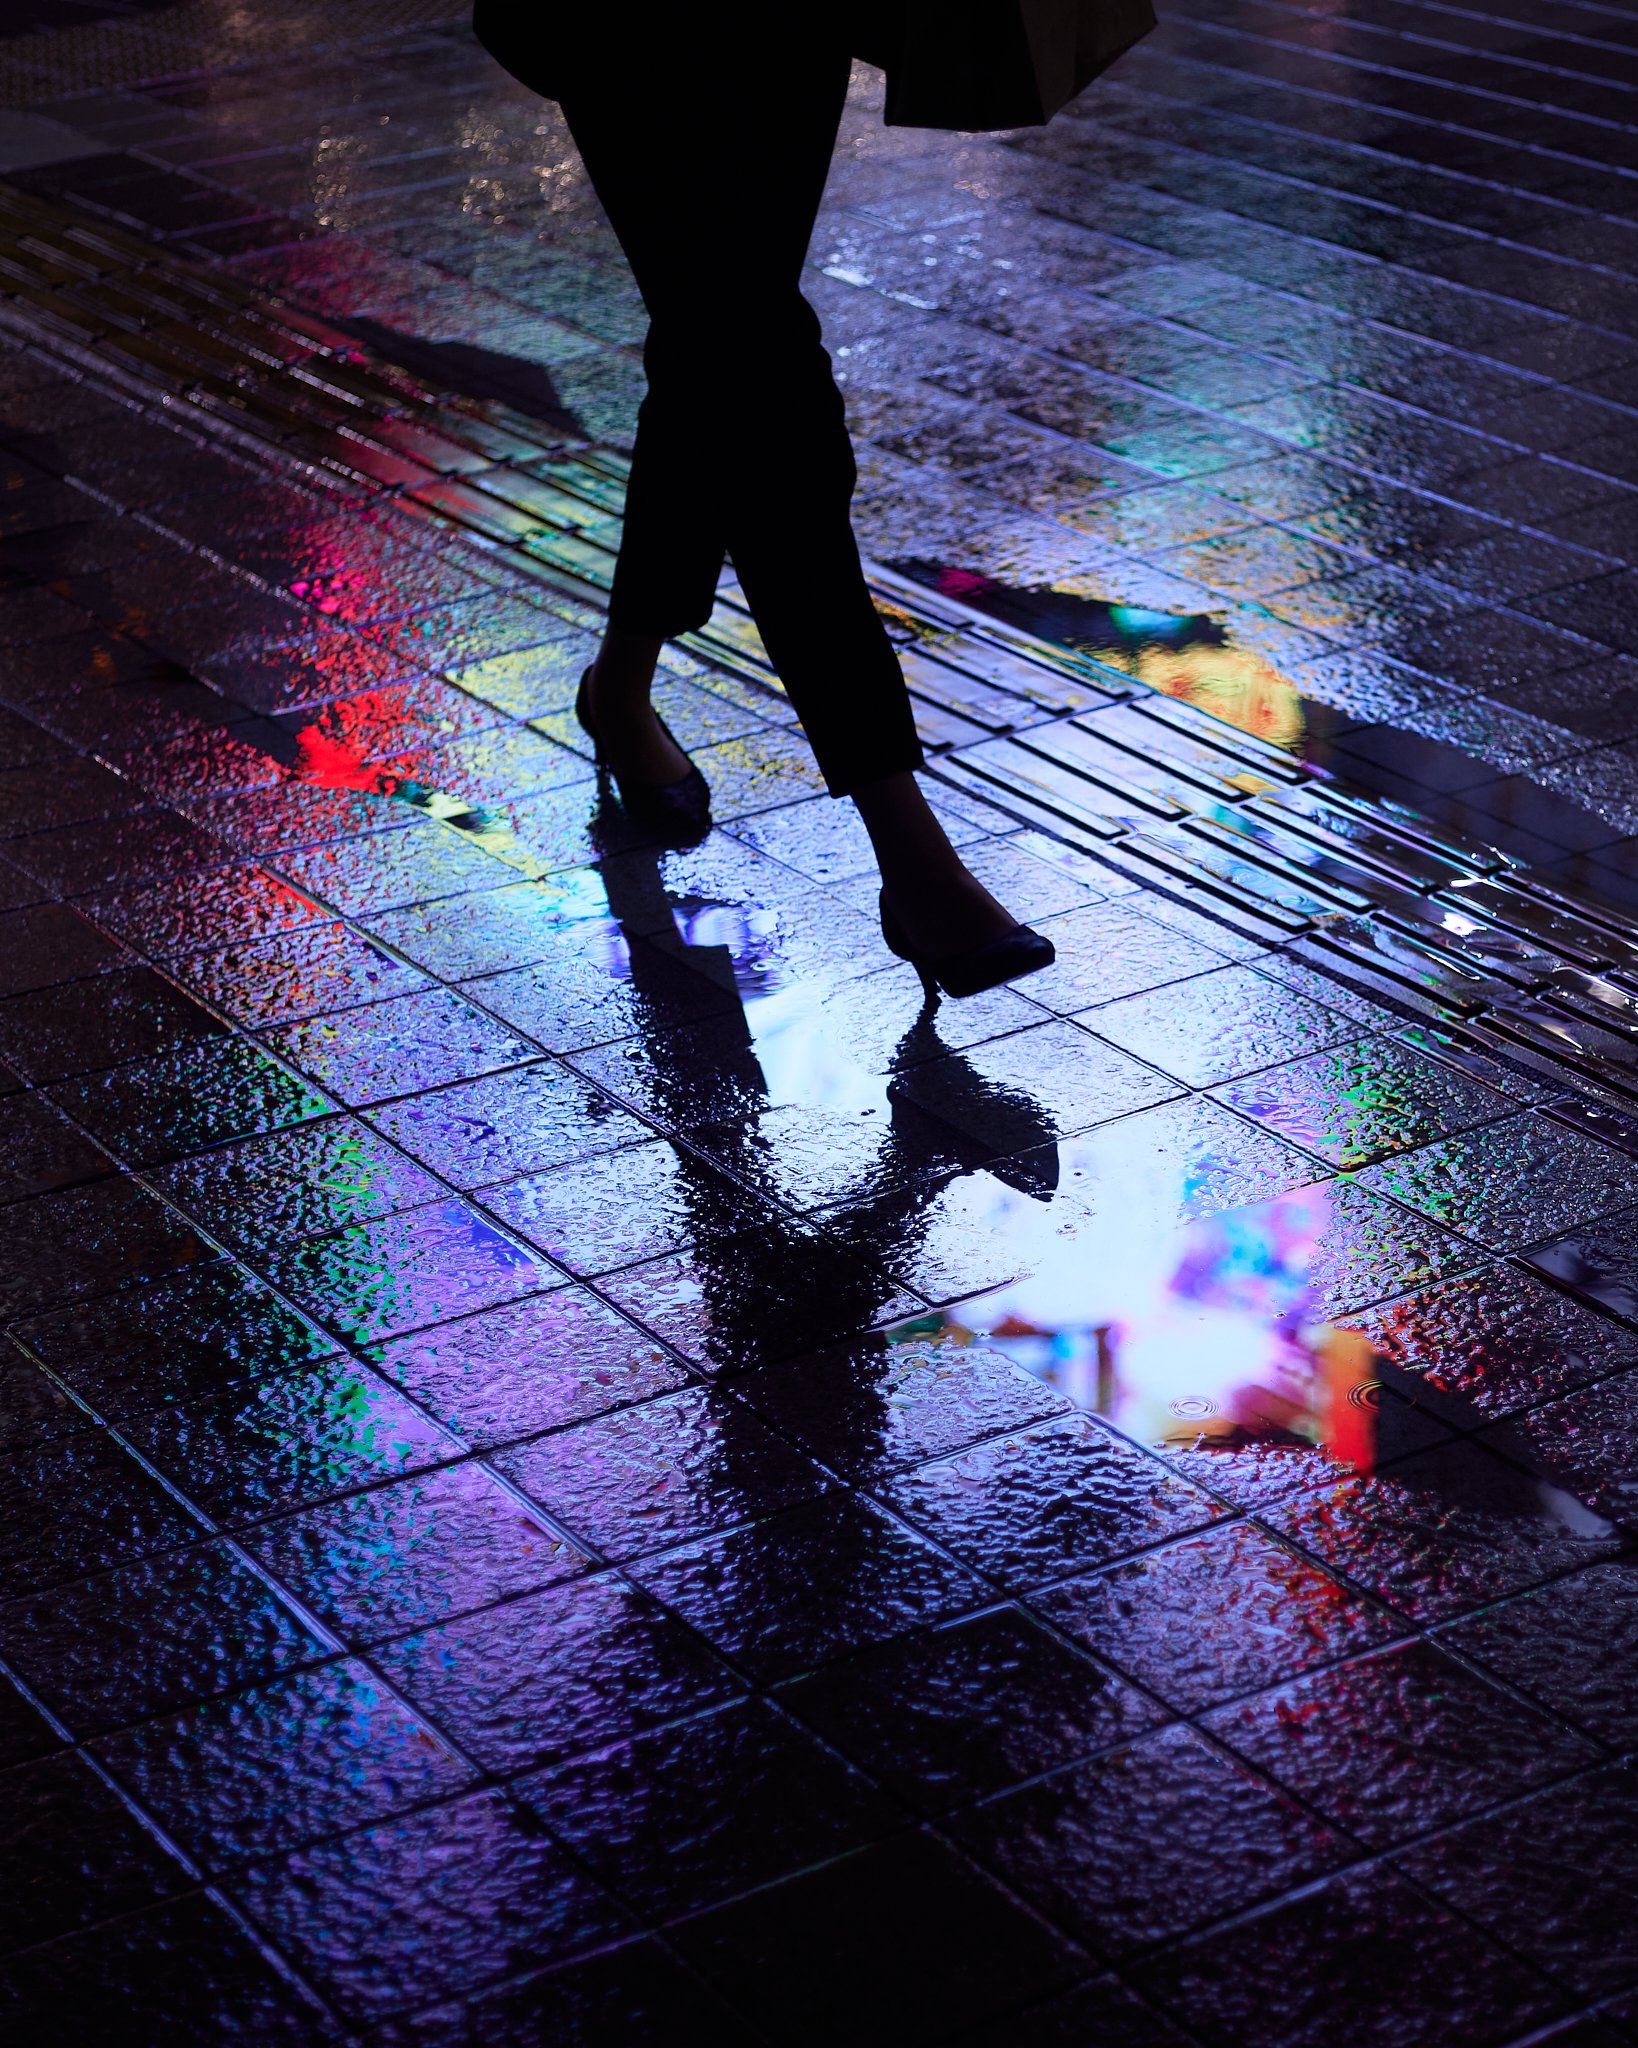
Keep it simple—gear and composition. I often shoot with just one prime lens, usually my 50mm f/1.8. A tighter focal length simplifies framing and forces clarity of subject, which is key to a cinematic feel.
In a really basic sense: Films tell stories about characters. So to make your photographs feel cinematic, they need to do the same thing.
I aim to photograph people in motion—even better if they’re holding some kind of object. This gives the feeling that something happened before this moment, and something else happens after. The viewer can fill in the blanks with their own ideas.
So much of night photography is observation—watching scenes unfold, spotting interesting characters. A single prime lens helps me stay in that observational mindset. And it keeps my kit light, so I stay out longer and shoot more.
With a prime, you’re not zooming in and out, second-guessing every shot. You may miss a few frames, but when you train your eye to a single focal length, your images improve because you start to see the world from that field of view.
And don’t be afraid to crop. Take a look at the raw file of the previous image—I cropped out a distracting ad on the right side to keep the eye centered. Cropping is a powerful finishing tool. I use it all the time.

ISO 1600 - 1/1000 s - f/2.8 - 85mm

ISO 400 - 1/1600 s - f/1.8 - 50mm

ISO 3200 - 1/125 s - f/4.0 - 65mm

ISO 1600 - 1/320 s - f/2.0 - 50mm
Put It All Together
When you put it all together; manual white balance for atmosphere, exposing for the highlights to get a strong raw file, using masking to create drama, and keeping it simple with your lens and compositions to drive focus to your subject, you’re well on your way to creating photos that feel like stills from a movie.
Remember, the key to cinematic night photography is creating an atmosphere and telling a story. Both require intention and creative thought when you’re shooting. If you know what look you’re going for before you even start shooting, you’ll be able to get in the right frame of mind and set yourself up for success from the get-go.
Night photography isn’t easy—it takes a lot of practice. But it’s extremely rewarding once you get the hang of it because you’re able to capture something not everybody can.
One last tip for a quick win—turn your camera horizontal. We’re trained by Instagram to shoot vertical, but movies are presented horizontal. It’s an easy switch that brings your frame one step closer to the cinematic look.
Now get out there and shoot.
Best of luck,
Kosta